
Aloha, ukulele enthusiasts! Whether you’re a seasoned player or a newcomer to the world of this delightful little instrument, one thing is for sure: you need to know how to string the ukulele properly. A well-strung ukulele is not only easier to play, but it also produces a more melodious, vibrant sound.
In this blog post, we’ll take you through the entire process of stringing a ukulele, step by step. By the end of this guide, you’ll be well-equipped to string your instrument with confidence and precision, ensuring that your ukulele remains in tip-top condition and ready to play beautiful tunes at a moment’s notice.
Before diving into the technicalities of stringing a ukulele, you might have considered other string instruments as well, each with its unique challenges and rewards in the learning process, which could guide your decision-making and commitment towards mastering the instrument of your choice.
Gather Your Materials
Before you begin, make sure you have the following items on hand:
- The new set (consult your instrument’s manufacturer for recommendations)
- Pair of wire cutters or a string winder with a built-in cutter
- Cloth for cleaning the fretboard
- Tuner (a smartphone app will work just fine)
Remove the Old Strings
First, loosen the tension on each one by turning the tuning pegs counterclockwise. As they become slack, carefully unwind them from the tuning pegs and remove them from the bridge. For a thorough clean, take this opportunity to wipe down the fretboard with a cloth, removing any built-up dirt or grime.
Attach the New Strings
With your new ones in hand, it’s time to attach them to your ukulele. Keep in mind that their order is crucial for optimal sound quality. Here’s the standard order for a soprano, concert, or tenor ukulele (from top to bottom, or left to right if you’re holding the instrument):
- G-string (thinnest)
- C-string (thickest)
- E-string
- A-string (second thinnest)
For a baritone ukulele, the order is:
- D-string (thinnest)
- G-string (thickest)
- B-string
- E-string (second thinnest)
Now, let’s attach the strings:
For a tie-bar bridge
- Start with the G-string. Thread the end of it through the hole in the bridge from the side closest to the soundhole.
- Pull it through and create a loop by folding it back on itself.
- Pass the end through the loop, tightening it around the bridge.
- Repeat this process for the remaining ones, following the correct order.
For a standard bridge
Begin with the G-string. Tie a knot at the end of it, leaving a small tail.
Thread the other end through the hole in the bridge, pulling it tight against the knot.
Repeat this process for the remaining ones, following the correct order.
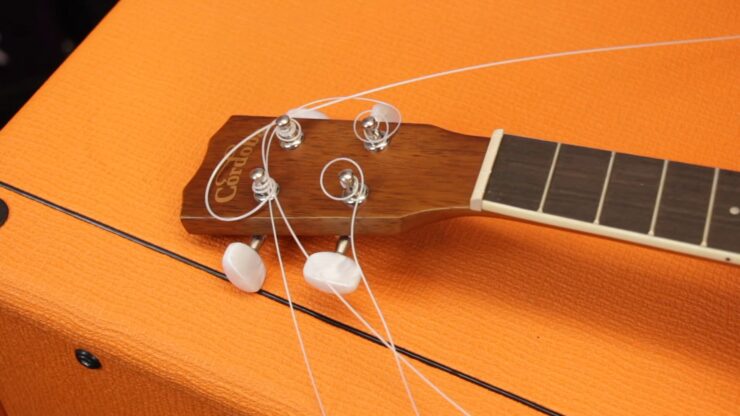
Secure the Strings to the Tuning Pegs
Now, it’s time to secure them to the tuning pegs. Starting with the G-string, follow these steps:
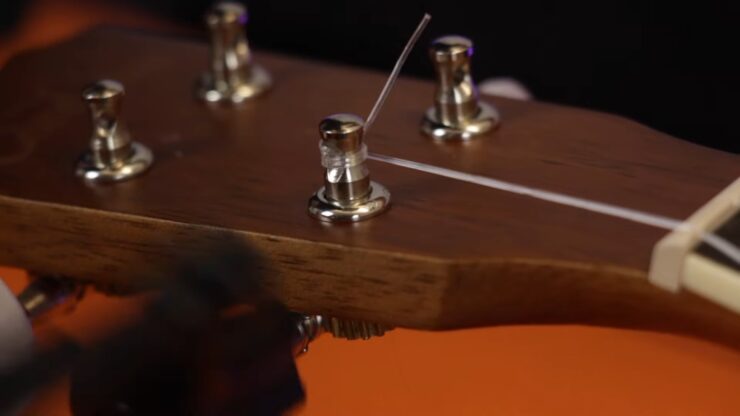
- Thread the end through the hole in the corresponding tuning peg, pulling it taut.
- Wind it around the peg in a clockwise direction, ensuring it wraps around the peg neatly and evenly. For the first wrap, guide it over the end sticking out of the peg hole; for subsequent wraps, guide it under the end. This creates a locking mechanism that prevents the string from slipping.
- Make sure it is seated properly in the nut slot as you wind it.
- Use your tuner to bring the string up to its proper pitch, but don’t worry about perfect tuning just yet.
Repeat this process for the remaining ones, following the correct order. Remember to wind the C, E, and A strings counterclockwise around their respective pegs.
Stretch and Tune the Strings
Now that all of them are secured to the tuning pegs, it’s important to stretch them to ensure stable tuning. To do this, follow these steps:
- Hold the ukulele firmly with one hand, placing your fingers on the fretboard around the 12th fret.
- With your other hand, gently tug each one up and away from the fretboard, starting with the G-string and moving through the remaining ones in order. Be careful not to pull too hard, as this could cause them to break.
- Once you’ve stretched all the strings, use your tuner to fine-tune each one to its proper pitch. This may take several attempts, as they will likely go out of tune as they continue to stretch.
Repeat the stretching and tuning process until the strings maintain their pitch consistently.
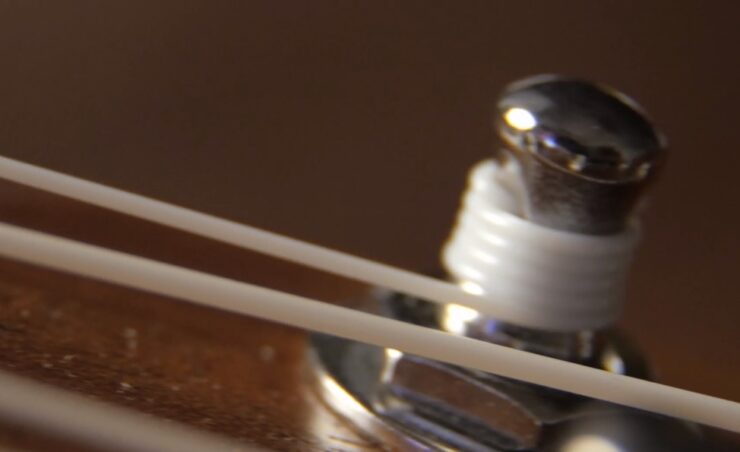
Trim the Excess String
After your ukulele is properly tuned and the strings are stretched, it’s time to trim the excess from the tuning pegs. Using your wire cutters, carefully snip the excess string close to the peg, leaving about 1/8 inch to prevent it from slipping out of the peg hole. Be cautious not to cut too close to the peg, as this could cause it to unravel or break.
How to read Ukulele chord diagrams

Reading these diagrams can be challenging for beginners, but with practice, it can become second nature. The first step is to understand the basics of the diagram itself. A chord diagram consists of a grid of horizontal and vertical lines that represent the frets and strings of the Ukulele.
The topmost line represents the nut of the Ukulele, and the vertical lines represent the frets. To read the diagram, the chord name is written above it, and the dots on the horizontal lines represent where to place your fingers on the corresponding frets.
The numbers on the dots indicate which finger to use, with 1 being the index finger, 2 being the middle finger, 3 being the ring finger, and 4 being the pinky finger. If there’s an “O” above a string, it means the string should be played open.
It’s essential to pay attention to the position of the dots on the frets. If they’re too close to the fret wires, they’ll produce a buzzing sound. On the other hand, if they’re too far away from the fret wires, it’ll produce a muffled sound.
Practice is essential when it comes to reading Ukulele chord diagrams. With time and dedication, anyone can master it and play beautiful music.
Maintaining Your Ukulele
Now that you’ve successfully restrung your ukulele, it’s essential to maintain it to ensure optimal sound quality and playability. Here are a few tips to keep your instrument in top shape:
- Clean your ukulele regularly: Wipe down the fretboard and body with a soft, dry cloth after each practice session to remove dirt, oils, and grime that can impact sound quality.
- Store your ukulele properly: Keep your instrument in a protective case when not in use, and avoid exposing it to extreme temperatures or humidity levels.
- Monitor string health: They wear out over time and can affect the sound and playability of your ukulele. Replace them every 3-6 months, or sooner if you notice significant wear or a decline in sound quality.
As we delve into the finer details of achieving perfect sound and harmony on your ukulele, it’s also essential to be aware of potential issues that could affect your instrument’s overall performance and learn how to address them effectively.
FAQs

How do I know when my ukulele strings are properly stretched?
They are properly stretched when they maintain their tuning consistently after several rounds of stretching and tuning. This process may take some time, but it’s crucial to ensure stable tuning and optimal playability.
How can I improve the tuning stability of my ukulele?
To improve the tuning stability of your ukulele, ensure that your strings are properly stretched and seated in the nut slots. Regularly cleaning them can also help maintain consistent tuning. Additionally, upgrading to a higher-quality set or investing in better tuning pegs may improve tuning stability.
How do I know if my ukulele strings around the tuning pegs?
Wind them tightly enough around the tuning pegs so that they stay in place without slipping, but not so tight that they become difficult to turn or risk breaking.
Conclusion
Congratulations, you’ve now mastered the art of stringing a ukulele! With your newfound knowledge, you can confidently replace your ukulele strings and maintain your instrument, ensuring that it always sounds its best.
You may also be interested in expanding your musical proficiency by learning different instruments, their maintenance, and tuning practices, thereby elevating your musical journey to a whole new level.
Remember that practice makes perfect, so keep strumming and fine-tuning your stringing technique to become an even more accomplished ukulele player. With your well-strung instrument in hand, the beautiful, harmonious world of the ukulele awaits. Happy strumming!